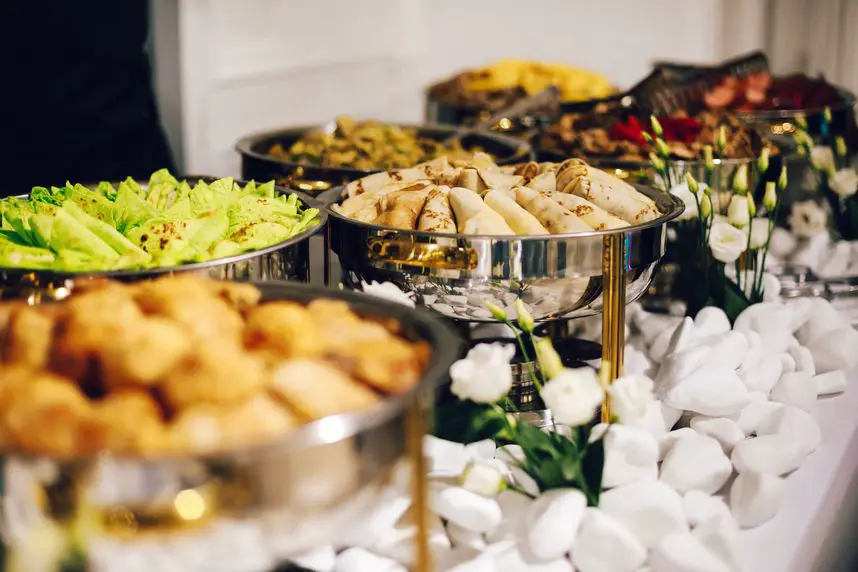
This is the ultimate step-by-step guide with a detailed sample menu designed to help you cater your own wedding easily and without hassle.
If you’ve looked into the prices of wedding catering, you know how expensive it can be! On the cheaper end, you’re looking at $15 per person, and on the higher end $100 per person (or more), which, if you have 200 guests at your wedding– is $20,000 total! Just for FOOD! That’s insane. But don’t panic! If you have some helpful friends and family, it’s very doable to cater your own wedding.
I myself have been playing with the idea of catering my own backyard wedding (coming up in June) even though I’m not exactly what my partner would call a chef... BUT I love the idea of community behind catering one’s own wedding, and I love the “budget” side of it too!
And by “catering your own wedding,” I don’t mean running around the kitchen the day of your wedding, trying to cook and get ready at the same time! Wedding dress train in one hand, spatula in the other…
That’s not what this is about, according to a book by Michael Flowers and Donna Bankhead entitled Cater Your Own Wedding: Easy Ways to Do it Yourself in Style which I learned so much from while researching the self-catering route, and highly recommend. A lot of what I’ll tell you in this post is directly from the advice I learned in this book, and might use for catering my own wedding. I really like the simple menus they provide, that can be prepared mostly in advance of the wedding… which seems pretty key!
You may also like my post: How To Do Wedding Food on a Budget: A Complete Guide
Getting Started Catering Your Own Wedding
Catering your own wedding will definitely save you money, but will require lots of pre-planning and a dedicated team of HELPERS. If you have to do this completely on your own, just… don’t. Don’t do it. Reach out to friends and family, and you’ll be surprised how much people want to help out.
First, you’ll have to decide on two things: Who your helpers will be, and your menu — and these two things are closely linked together. Skills and experience-level of your helpers must be taken into consideration after all.
In this post, I’ll provide you with menu ideas for catering your own wedding, as well as recipes, instructions, and shopping lists for you and your helpers to use, based on my research. Follow this guide and you’ll be able to pull off a lovely self-catered wedding!
Contact your wedding venue
First, contact your venue (or do this while looking for a venue!) to ask if you can bring outside food and equipment in. Some venues require you to use their catering, or a list of approved caterers.
If you’re hosting your wedding on private property, then no worries here! You’ll just have to make sure you have all the necessary equipment, which I’ll talk about in a minute.
You’re more likely to be able to bring in your own food at places like retreat centers, community centers, etc… and of course, public parks and beaches.
Choose your catering helpers
You’ll need to ask your most reliable friend or family member to be your reception coordinator, or even better — hire one, if you have the space in your budget. A reception coordinator will make sure that each of your helpers has everything that they need, and that everything is in order on the day of your wedding.
You’ll also discuss the reception layout with the coordinator so that they know exactly where each dish should be placed, the tables, chairs, etc. Draw out a diagram and label it meticulously. Give a copy to your coordinator and to each friend or family member helping you out.
You’ll need 12-20 friends or family members (depending on how many guests you’re expected) in order to pull this off well. This includes set-up and clean-up people.
When asking people to help you cater, remember that most people are very honored and eager to help you with something like this. Having said that, be sure to ask reliable and mature people who you can count on to follow through with your requests and not back out at the last minute.
Let your friends and family know that helping you out can be their wedding present to you… and don’t forget to express lots and lots of gratitude!
Before anything, have a group meeting with your helpers and reception coordinator preferably a couple of months (at least) before your wedding. Let them know their jobs and give them each their printed instructions and shopping lists (which you can either pay for up front or reimburse them for later). Let them know what the reception space will look like and what they can expect, and ask them if they have any questions.
Choose your menu
There are tons of different menus you could plan to make, and if there are some tried and true menus that you know to be delicious and work well — use them! Many families have their own special recipes, some from their own cultures, that are perfect for catering one’s own wedding. If not, you can use the recipes I’ll discuss here.
Authors Michael Flowers and Donna Bankhead write about several possible DIY menus in their book, but here I’ll tell you how to design what they call “The Ultimate Reception” menu. As they say, it’s a bit more work but it is guaranteed to wow. Most of the dishes can be made a day or two beforehand, so all your cooking crew will have to do on the day of the actual wedding (for the most part) is put on the finishing touches.
Here’s the menu for the Ultimate self-catered wedding:
Shrimp and Crabmeat Delights
Chicken Salad Pastry Swans
Lush and Lavish Meatballs
Chocolate-dipped Strawberry Trees
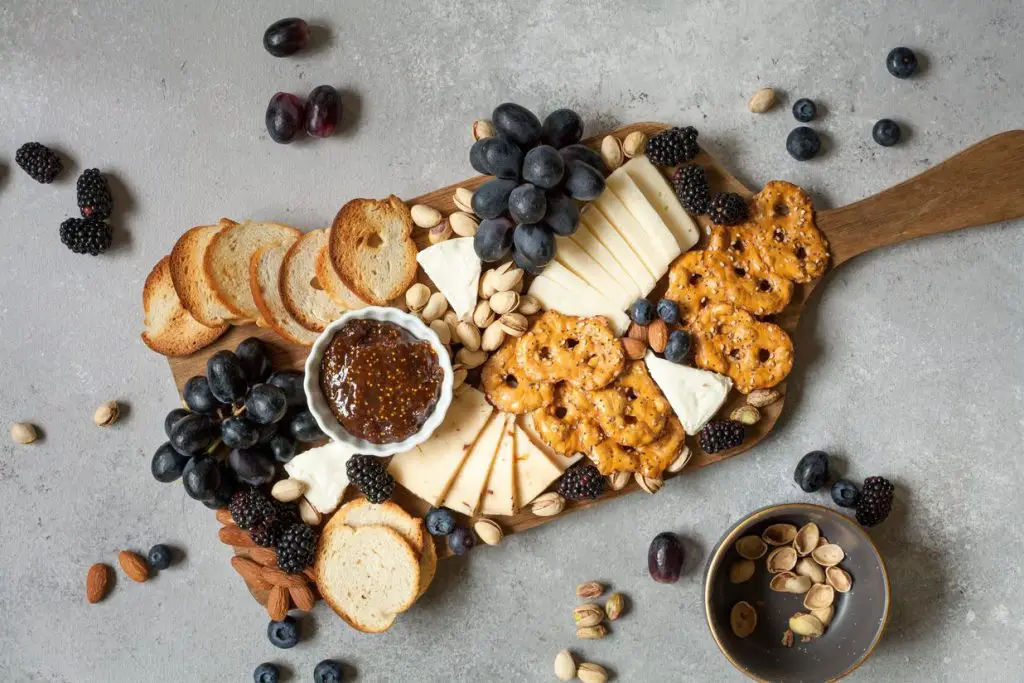
Domestic Cheese Trays with Assorted Crackers
Marinated Vegetables
Mixed Nuts
Butterfly Wedding Cookies
Freshly Brewed Regular and Decaf Coffee
Citrus Fruit Punch
NOTE ON VEGETARIAN DISHES: If you want to make this menu more vegetarian-friendly, which is great idea, you can replace the chicken in the Chicken Salad Pastry Swans with a meat alternative or potatoes. And the Meatballs can become veggie meatballs or even falafel. You could replace completely one of the recipes above with a vegetarian dish that you adore.
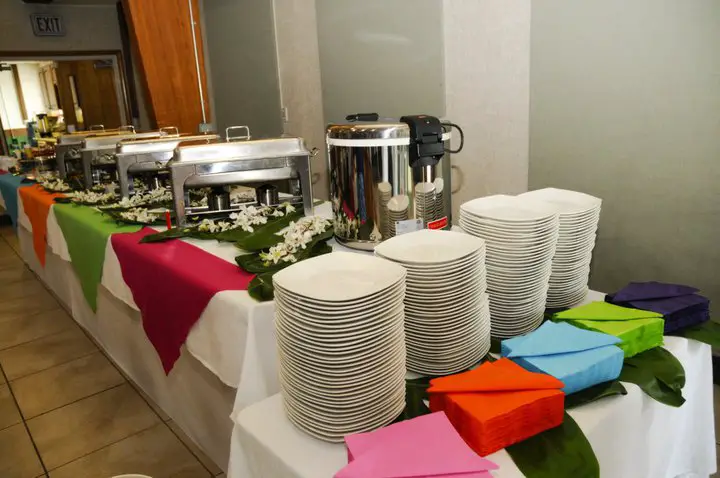
Rent, borrow, or buy any necessary equipment or furniture
To cater your own wedding, you’ll need certain items to be able to cook and serve your guests. Depending on where your wedding’s being held, and the style of your wedding, some of these suggestions might be different. For example, this list includes rounds, but you may be renting long tables.
Keep that in mind and change the numbers to suit your own preferences and numbers. And then be sure to rent, borrow, or buy these items, or equivalents before your wedding:
| 100 guests | 150 Guests | 200 Guests | |
| 60 inch round tables | 7 | 7 | 7 |
| 8 foot by 30 inch banquet tables | 8 | 8 | 8 |
| 36 inch round tables | 4 | 4 | 4 |
| Folding chairs | 100 | 150 | 200 |
| 120 inch round white tablecloths | 7 | 7 | 7 |
| 90 inch round white tablecloths | 8 | 8 | 8 |
| 54 inch x 120 inch white tablecloths | 8 | 8 | 8 |
| 21 foot white skirting segments | 8 | 8 | 8 |
| 5-gallon punch fountain | 1 | 1 | 1 |
| 5 oz glasses for punch | 100 | 150 | 200 |
| 90-cup stainless steel coffee urn | 2 | 2 | 2 |
| Coffee cups | 75 | 100 | 125 |
| Coffee saucers | 75 | 100 | 125 |
| Sugar bowls | 4 | 4 | 4 |
| Creamers | 2 | 2 | 2 |
| Spoons | 75 | 100 | 125 |
| Forks | 275 | 400 | 550 |
| 8 inch glass plates | 275 | 400 | 550 |
| Cake knife and server | 2 sets | 2 sets | 2 sets |
| Napkins | 475 | 625 | 725 |
Prepare Your Friend and Family Member “Teams” and Give them their Job Descriptions
This menu will require 10 teams of people (about 12-20 people total).
Each one job is described below and can be given to a team of 1-3 people, depending on how many people you think are needed for the job and how capable each person is. For example, the setup and breakdown team will need more than one person for sure, since it’s a manual job that will require at least a couple of sets of hands.
You will need to assign people to the following ten teams:
Team #1: Set up/Break down Team
Team#2: Shrimp and Crabmeat Delights Team
Team #3: Chicken Salad Pastry Swans Team
Team #4: Meatballs Team
Team #5: Chocolate-dipped Strawberry Trees Team
Team #6: Cheeseball/Cheese trays Team
Team #7: Marinated Vegetable Team
Team #8: Wedding Cookies and Leather Leaf Team
Team #9: Coffee Team
Team #10: Punch Team
The idea is that the work of your 10 teams will also come together as a nice, big beautiful symphony to cater your wedding. By themselves, each team’s job is manageable and not too overwhelming. But together, this is a gorgeous menu that will impress your guests and surprise them that the work wasn’t done by a professional catering company.
You should print out this list of responsibilities for each of your ten teams, so that you can hand it to them the day you have your catering meeting.
Team #1: Set up and Break down Team
This team will need to be strong in order to do some heavy lifting, and will also need a bit of an artistic eye in order to lay out the table clothes and napkins in an attractive way.
In addition to these instructions, give your setup/breakdown team a map of the reception space (and photos if possible) and tell them how many tables/chairs to set up and where to put them.
Your reception coordinator should also have all of this information so that the coordinator and the team (all of the teams actually) can talk to each other on the day of your wedding and work out any complications. You don’t want to be bothered with things like tablecloths as you’re getting your hair and make-up done and trying to relax.
Give this list of responsibilities to Team #1:
- Find two large, presentable plastic trash cans to be used at the reception and 6-10 trash can liners.
- Arrive at the reception four hours prior to the ceremony to arrange tables and chairs and lay out tablecloths.
- Set up: dishes, silverware, punch fountain, chafing dishes, and centerpieces.
- During the reception, keep an eye out on the food tables and make sure everything looks neat and tidy. Keep an eye on the trash and replace the liners when it gets full.
- After the reception, help with clean up and returning rented items.
Team #2: Shrimp and Crabmeat Delights Team
This job doesn’t require any cooking–just chopping, stuffing, assembling… Here are the instructions to print and give to Team #2:
- The day before the reception, make the shrimp and crabmeat delights following the recipe below and keep them in your fridge. You’ll need a lot of space.
- Bring the shrimp and crabmeat to the reception space on the day of the wedding and set them out on the buffet table no more than one hour before the ceremony.
- Keep any extra in the fridge or in the shade out of the sun, and keep an eye on the buffet table to replenish during the evening as necessary.
- Help with clean up at the end of the reception.
Shopping list for shrimp and crabmeat delights:
| 100 Guests | 150 Guests | 200 Guests | |
| Fresh roma tomatoes | 75 | 100 | 125 |
| Baby corn (15 oz. can, drained) | 4 | 6 | 8 |
| Sliced black olives (3.8 oz., drained) | 1 | 2 | 3 |
| Sliced pimientos (7 oz. jar, drained) | 1 | 2 | 2 |
| Seafood salad stuffing (recipe given) | 7 lbs. | 11 lbs. | 14 lbs. |
Shopping list for seafood salad stuffing:
| 100 Guests | 150 Guests | 200 Guests | |
| Mayonnaise | 2 cups | 3 cups | 4 cups |
| Sour cream | 1 cup | 1.5 cups | 2 cups |
| Salt | 2 tsp. | 3 tsp. | 4 tsp. |
| White ground pepper | 1 tsp. | 2 tsp. | 3 tsp. |
| Melted butter (warm, not hot) | 12 oz. | 18 oz. | 24 oz. |
| Frozen bay shrimp (thaw/drain) | 1.5 lbs. | 2.25 lbs. | 3 lbs. |
| Frozen imitation crab (thaw/drain) | 2.5 lbs | 3.75 lbs | 5 lbs |
| Fresh celery, diced | 4 cups | 6 cups | 8 cups |
| Fresh green onion, chopped | 2 cups | 3 cups | 4 cups |
| Dried parsley, .5 oz. jar | 1 | 2 | 3 |
| 20 inch round tray (glass or silver) | 2 | 2 | 2 |
| Small tongs | 4 | 4 | 4 |
Recipe for making the seafood salad stuffing:
- Whip the mayonnaise, sour cream, salt, and pepper together in a large mixing bowl. Slowly whip the butter into the mixture. Fold in the shrimp, crab, celery, and onion with a rubber spatula. Blend well but don’t overmix it.
- Cover it tightly with plastic wrap and place in the fridge until ready to stuff the tomatoes.
Recipe for shrimp and crabmeat delights:
- Remove the small core from the tomatoes.
- Slice them in half length-wise.
- Scrape out the seeds and inner contents from the tomato halves with a spoon.
- Stuff the tomato halves with the seafood salad stuffing (recipe above).
- Slice the baby corn in half lengthwise. Place a corn half on top of each stuffed tomato.
- Place a sliced olive on top of the corn and lay a strip of pimento across the olive.
- Sprinkle with chopped parsley.
- Arrange them on trays and cover loosely with plastic wrap.
- Refrigerate.
Team #3: Chicken Salad and Pastry Swans Team
This one isn’t necessarily hard, but should be reserved for your friends who like to cook because it’ll take a good 3-5 hours to complete. Here are the instructions to give Team#3:
- The day before the reception, make the pastry and chicken salad for the Chicken Salad Pastry Swans according to the recipes.
- A few hours before the reception, assemble and stuff the swans.
- You’ll need plenty of room in your fridge to fit the swans.
- Place the swans on the buffet able no more than an hour before the ceremony, and refrigerate the extras to replenish the buffet table as needed during the evening.
- Keep an eye on the swans and replenish them as needed.
- Help clean up at the end of the reception.
Shopping list for Swan Pastry:
| 100 Guests | 150 Guests | 200 Guests | |
| Water | 4 qts. | 6 qts. | 8 qts. |
| Margarine | 4 lbs. | 6 lbs. | 8 lbs. |
| Bread flour, sifted | 12 cups | 18 cups | 24 cups |
| Eggs, large | 6 dozen | 9 dozen | 12 dozen |
| Pastry bags | 1-2 | 1-2 | 1-2 |
| 20 inch round trays (silver or glass) | 4 | 4 | 4 |
Shopping list for Chicken Salad:
| 100 Guests | 150 Guests | 200 Guests | |
| Mayonnaise | 5 pints | 7.5 pints | 10 pints |
| Sweet pickle relish | 2 cups | 3 cups | 4 cups |
| Salt | 2 tbsp. | 3 tbsp. | 4 tbsp. |
| White pepper | 2 tsp. | 3 tsp. | 4 tsp. |
| Tarragon vinegar | 1 tbsp. | 1.5 tbsp. | 2 tbsp. |
| Worchestershire sauce | 2 tbsp. | 3 tbsp. | 4 tbsp. |
| Cooked white chicken meat, diced | 10 lbs. | 15 lbs. | 20 lbs. |
| Hard-boiled eggs, chopped | 8 | 12 | 16 |
| Finely chopped green onion | 2 cups | 3 cups | 4 cups |
| Finely chopped celery | 4 cups | 6 cups | 8 cups |
Recipe for the Chicken Salad (to stuff inside the swan pastries later):
- Combine mayonnaise, pickle relish, salt, pepper, vinegar, and Worcestershire sauce in a mixing bowl and whip them together.
- Put cooked diced chicken, chopped eggs, chopped green onion, and celery in a mixing bowl. Pour the mayonnaise mixture over the chicken mixture. Blend them all together with a rubber spatula but don’t overmix.
- Cover with plastic wrap and refrigerate until you’re ready to stuff the swans.
Recipe for Chicken Salad Pastry Swans (Pastry Dough):
- This makes 25 swans. Make 25 at a time because that’s about how many fit in a conventional oven. For 100 guests, make 4 batches. For 15- guests, 6 batches, and for 200 guests, 8 batches.
- The swan necks and bodies may need to be made the day before. They don’t have to be refrigerated.
- You can stuff and assemble them with chicken salad a few hours before the wedding.
- For one batch of pastry swans, use: 1 qt. water; 3 cups sifted flour; 1 lb. margarine; and 18 large eggs.
- Combine the margarine and water and bring to a boil.
- While whipping constantly, add three cups of flour and cook until the mixture rolls away from the sides of the pot (about one minute).
- Still whipping, slowly add 18 eggs until the mixture is at a medium stiffness (about two minutes).
- Remove from heat and cool for ten minutes.
- Load your pastry bag (without inserting a pastry tip) half full with dough.
- Pipe out 25 lemon-sized dough balls spaced 2 inches apart on ungreased cookie sheets. Make the sizes consistent. These are the swan bodies.
- Leave the rest of the dough in the bowl.
- Bake the dough balls at 375 degrees until dark golden brown (30-35 minutes).
- Allow them to cool for 30 minutes.
- If the pastries start to fall while cooling, immediately put them back in the oven to bake a little longer.
- Squeeze any dough left in the pastry bag back into the bowl with the rest of the dough.
- Without cleaning the pastry bag, insert a standard round pastry tip with an opening the size of a pencil eraser.
- Load the pastry bag with the rest of the dough and start squeezing out what will be the necks of the swans. They should look like question marks and be proportional to the bodies of the swans.
- Put the necks in the over at 375 degrees fro 12-14 minutes until dark golden brown. Cool for 30 minutes.
- Cut the body of the swans in half to make a top and bottom half. You’ll stuff the chicken salad (recipe above) into the bottom half. Cut the top half in half to make two wings and then place them back onto the bottom half spread out (as wings).
- Place the necks in the middle.
If you want to see this done visually, take a look at this video. This video is a little goofy, and he’s making DESSERT swans, NOT the recipe I’m explaining here… But if you watch it, you’ll get the idea of what the swans are sort of supposed to look like!
Team #4: Meatballs Team
These can be made weeks in advance and frozen. The sauce is really simple and easy to make. Give this list of responsibilities to Team Meatball:
- Make meatballs according to the recipe. You can make them a few weeks before the wedding if you want and keep them frozen.
- Arrive at the ceremony no more than an hour before and set the meatballs up in the reception hall.
- Chafing dishes will be waiting for you at the reception hall. Light the Sternos, pour the meatballs in the pan, and cover.
- Help clean up at the end of the reception.
Shopping list for meatballs:
| 100 Guests | 150 Guests | 200 Guests | |
| White bread, crusts removed | 18 slices | 24 slices | 30 slices |
| Lean ground beef | 12 lbs. | 16 lbs. | 20 lbs. |
| Fresh, large eggs, beaten | 6 | 8 | 10 |
| Onion, diced fine | 3 cups | 4 cups | 5 cups |
| Beef broth, canned | 3 cups | 4 cups | 5 cups |
| Garlic cloves, diced fine | 6 | 8 | 10 |
| Salt | 2 tbsp. | 3 tbsp. | 4 tbsp. |
| Paprika | 2 tbsp. | 3 tbsp. | 4 tbsp. |
| Ground black pepper | 1 tbsp. | 1.5 tbsp. | 2 tbsp. |
| Thyme, dried | 2 tbsp. | 3 tbsp. | 4 tbsp. |
| Yield: | 225 | 335 | 450 |
Shopping list for meatball sauce:
| 100 Guests | 150 Guests | 200 Guests | |
| Chili sauce, 12 oz. bottle | 6 | 8 | 10 |
| Grape jelly, 1 lb. jar | 3 | 4 | 5 |
| Sterno, 8 oz. cans | 4 | 4 | 4 |
| Matches | 1 book | 1 book | 1 book |
| Serving spoons | 4 | 4 | 4 |
Recipe for meatballs (can be made several weeks before the wedding):
- Preheat oven to 375 degrees.
- Soak bread in cold water for two minutes in a mixing bowl. Drain and squeeze out excess water.
- Add ground beef, eggs, onions, broth, garlic, salt, paprika, pepper, and thyme and mix well.
- Shape into 1 inch balls, place on cookie sheets and bake for 15 minutes.
- Remove them from the oven and cool for one hour.
- Place in zip lock bags and freeze.
- Take the zip lock bags out and put them in the fridge to a thaw one day before the wedding.
- On the morning of the wedding, arrange the meatballs into high lipped pans that will fit your oven.
- Make the sauce using the recipe below and pour the hot sauce over the cooked meatballs.
- Gently make sure the meatballs are coated with the sauce.
- Bake them for 30 minutes at 350 degrees.
- Remove from oven, wrap in foil, and take to reception.
Recipe for meatball sauce:
- Combine chili sauce and grape jelly in a large bowl and whip mixture until it’s smooth.
- Place mixture in a saucepan and cook until hot.
Team #5: Chocolate-Dipped Strawberry Trees Team
A chocolate-dipped strawberry tree, or tower, is a cone-shaped dessert tower of chocolate-dipped strawberries. It’s easily $100 (or way more) if you order it from a caterer or bakery, but it’s actually quite simple to make at home. And fun!
This is a job for your most artistic and detail-oriented friends or family members. Chocolate dipped strawberries are beautiful and delicious in and of themselves, but chocolate dipped strawberry TREES are on another level.
Ask Team #5 to follow these instructions:
- Do this part several days ahead of time: Make the tree forms.
- Dip the strawberries and assemble the trees the day before the reception.
- Make sure you have room in your fridge.
- Arrive at the reception no more than an hour before to place the trees on their designated table.
- Help with clean up when the reception is over.
Shopping list for chocolate-dipped strawberry trees:
| 100 Guests | 150 Guests | 200 Guests | |
| Green leaf lettuce (not iceberg) | 4 heads | 4 heads | 4 heads |
| Strawberries | 30 pints | 36 pints | 42 pints |
| Semisweet chocolate chips, 12 oz. package | 7 | 10 | 14 |
| White Styrofoam cones, 18 inches in height by 5 inches in diameter base | 2 | 2 | 2 |
| White Styrofoam circles, 12 inches diameter by 1 inch thick | 2 | 2 | 2 |
| Toothpicks | 350 | 350 | 350 |
| Glue | 1 bottle | 1 bottle | 1 bottle |
| 20 inch round trays (silver or glass) | 2 | 2 | 2 |
| Small tongs | 4 | 4 | 4 |
Strawberry trees recipe:
- To build the forms of the strawberry trees, glue the Styrofoam cones to the Styrofoam circles. Let them dry.
- Once they’re completely dry, stick the toothpicks in at a 45 degree angle, about an inch apart. Each cone should hold about 175 toothpicks.
- To make the chocolate-dipped strawberries, put the chocolate in a large steel bowl. Using a double boiler, lower the bowl into a pot of boiling water to melt the chocolate.
- Stir until creamy and smooth.
- Hold the strawberries by their leaves and dip them into the chocolate. Gently shake them off.
- Place them directly onto an ungreased cookie sheet.
- Refrigerate the strawberries until the chocolate is completely hardened.
- Put the strawberries into zip lock bags and keep them in the fridge until you’re ready to build the trees.
- To assemble the strawberries onto the trees: First, wash the green leaf lettuce (not iceberg) and cut off 3 inches from the core end.
- Press the leaves, with the shiny sides out, through the toothpicks and onto the Styrofoam cones, until the entire cone is covered in leaves.
- Starting at the base of the cone, press the strawberries into each toothpick with the strawberry’s point going outward.
- Continue under the cone is covered.
- Place the trees in the fridge, removing shelves as needed to fit them in!
- The day of the wedding, bring the trees, trays, and excess bagged strawberries.
- Arrange the trees in the reception on the buffet table with the tongs.
This isn’t the exact same product or process described above, but it’s VERY similar and super beautiful. If you’re not sure how to go about this, this video will offer some inspiration:
Team #6: Cheeseball and Cheese Trays Team
This is a really easy job! If your friends or family members can manage to roll cheeseballs, then they can handle this role!
Give Team #6 these directions:
- Make the cheeseballs the day before the reception.
- Arrive at the reception hall an hour before the ceremony and assemble the cheese trays.
- Keep an eye on your trays and replenish them as necessary.
- Help cut and serve the wedding cake during the evening.
- Help with clean up at the end of the reception.
Shopping list for cheeseball/cheese trays:
| 100 Guests | 150 Guests | 200 Guests | |
| Sharp cheddar cheese (1.5 lb. blocks) | 4 | 4 | 4 |
| Monterey Jack cheese (1.5 lb. blocks) | 4 | 4 | 4 |
| Cream cheese (8 oz. block) | 8 | 12 | 16 |
| Crushed pineapple, drained (8 oz. can) | 2 | 3 | 4 |
| Sharp shredded cheddar (8 oz. can) | 2 | 3 | 4 |
| Dill | 4 tbsp. | 5 tbsp. | 6 tbsp. |
| Chopped pecans (8 oz. bag) | 3 | 4 | 5 |
| Red seedless grapes, bunches | 4 | 4 | 4 |
| Limes | 3 | 3 | 3 |
| Strawberries | 1 pt | 1 pt | 1 pt |
| Crackers (2 lb. box) | 2 | 3 | 4 |
| 20 inch tray (glass or silver) | 2 | 2 | 2 |
| Cake stands | 2 | 2 | 2 |
| Knives | 8 | 8 | 8 |
| Cracker basket | 2 | 2 | 2 |
Cheeseball recipe:
- Let cream cheese sit outside fridge for three hours.
- In a mixing bowl, mix cream cheese, shredded cheddar, crushed pineapple, and dill.
- Form two equal-sized cheeseballs with your hands.
- Roll the balls in pecans until they’re covered.
- Wrap and place in the fridge until you’re ready to assemble the trays
- Wash green leaf lettuce and cut off end core. Place in a bag.
- Cut the lemons and limes into wedges and place in a bag.
Assembling the trays at the reception hall:
- Fan out the lettuce on the cake stands.
- Place the cheeseball in the middle and place grapes around the base, along with some lime and lemon slices.
- Put two blocks of cheddar and two blocks of Monterrey on each tray.
- Place the baskets with the crackers next to the cheese trays.
Team #7: Marinated Vegetables Team
This one is very simple and doesn’t require much more than chopping and opening cans. Here are the responsibilities to give to Team #7:
- Make the marinated veggies a day or two before the wedding.
- Arrive an hour before the ceremony to place your dish.
- At the end of the reception, help with clean up.
Shopping list for marinated veggies:
| 100 Guests | 150 Guests | 200 Guests | |
| Sugar | 5 cups | 7.5 cups | 10 cups |
| White vinegar | 3.75 cups | 5.75 cups | 7.5 cups |
| Tarragon vinegar | 2 tbsp. | 3 tbsp. | 4 tbsp. |
| Vegetable oil | 2.5 cups | 3.75 cups | 5 cups |
| Black pepper | 5 tsp. | 2 tbsp. | 3 tbsp. |
| Salt | 1 tbsp. | 1.5 tbsp. | 2 tbsp. |
| French-style green beans, (16 oz. can, drained) | 5 | 8 | 10 |
| Green peas (16 oz. can, drained) | 5 | 8 | 10 |
| Shoepeg corn (16 oz. can, drained) | 5 | 8 | 10 |
| Diced pimentos (2 oz. jar, drained) | 5 | 8 | 10 |
| Celery, diced | 5 cups | 8 cups | 10 cups |
| Green pepper, diced | 5 | 8 | 10 |
| Green onion, diced, bunches | 5 | 8 | 10 |
| 20 inch round trays (glass or silver) | 2 | 2 | 2 |
| Serving spoons | 4 | 4 | 4 |
Recipe for marinated vegetables:
- Make the marinade: Mix sugar, vinegars, oil, pepper, and salt in a saucepan and cook over medium heat until the sugar is dissolved.
- Put the veggies in a large bowl, add the marinade, and mix.
- Cover and refrigerate.
- Bring to the reception and place on the trays to serve.
Team #8: Butterfly Wedding Cookies and Leather Leaf Team
This can be done by one of your friends who loves to bake. Here are the responsibilities:
- Make the cookies the day before the reception.
- Pick up a bundle of leather leaf from the florist and rinse it. Put it in the fridge.
- Before leaving for the reception, cut the leafless stems off the leather leaf.
- Arrive at the reception an hour before the ceremony.
- Place the leather leaf, shiny side up, around the buffet table.
- Place the cookies on the buffet table.
- Pour the mixed nuts into bowls with spoons inserted and place them on the buffet table.
- Help with clean up at the end of the reception.
Shopping list for the cookies and leather leaf:
| 100 Guests | 150 Guests | 200 Guests | |
| Butter, softened | 4 cups | 6 cups | 8 cups |
| Vanilla extract | 1 tbsp. | 1.5 tbsp. | 2 tbsp. |
| Flour, all purpose | 6 cups | 9 cups | 12 cups |
| Powdered sugar, sifted | 3 cups | 4.5 cups | 6 cups |
| Cornstarch | 1.5 cups | 2 cups | 2.5 cups |
| Gourmet jelly beans, small (regular jelly beans will melt) | 2 cups | 3 cups | 4 cups |
| Coconut, flaked | 2.5 cups | 3.75 cups | 5 cups |
| Leather leaf, bunches | 6 | 6 | 6 |
| Mixed nuts, 16 oz. can | 4 | 6 | 8 |
| Glass bowls (cantaloupe size) | 4 | 4 | 4 |
| Small serving spoons | 8 | 8 | 8 |
Recipe for butterfly wedding cookies:
- Beat the butter and vanilla with an electric mixer at medium speed until creamy.
- Blend in flour, sugar, and cornstarch slowly.
- Cover and refrigerate for two hours.
- Shape into 1 inch balls. Roll into a small log.
- Roll the logs into the coconut.
- Place on an ungreased cookie sheet about 1 inch apart.
- Pinch the middle of the logs to create bow ties.
- Put the gourmet jelly beans in the middle of each bow tie to make the body of the butterfly.
- Bake at 300 degrees for 25 minutes or until the coconut is brown.
- Allow them to cool and then place gently in containers to bring to the reception.
Team #9: Coffee Team
No cooking talents needed here! And no advance preparations! Here are the responsibilities for the coffee team:
- Make small signs for regular and decaf coffee
- Arrive at the reception an hour before the ceremony to ensure that the urns are ready.
- The coffee will take about 30 minutes to an hour to brew, so make sure that you get it started in time for the beginning of the reception.
- Place small bowls and creamers on the buffet table designated for coffee.
- Fill the bowls with sugar and sweeteners.
- Fill the creamers with half and half.
- Place the coffee signs in the correct spots.
- Leave backup supplies under the table.
- Keep an eye on the table during the reception to make sure it’s clean and to replenish it.
- Help with clean up at the end of the reception.
Shopping list for the coffee team:
| 100 Guests | 150 Guests | 200 Guests | |
| Regular coffee | 10 oz. | 15 oz. | 20 oz. |
| Decaf coffee | 10 oz. | 15 oz. | 20 oz. |
| Water per urn | 50 cups | 75 cups | 90 cups |
| Sugar | 1 lb | 1.5 lbs. | 2 lbs. |
| Sweet ‘N Low (Packets) | 50 | 75 | 100 |
| Equal (Packets) | 25 | 35 | 50 |
| Cream (half and half) | 2 qts. | 3 qts. | 4 qts. |
| Glass bowls (softball size) | 6 | 6 | 6 |
| Regular sign, decaf sign | 1 each | 1 each | 1 each |
| 12 foot three-pronged extension cord | 2 | 2 | 2 |
Coffee “recipe”:
- Arrive at the reception and make sure that the coffee table is located near an outlet. If not, you may have to move it or use the extension cords.
- Start brewing coffee in the urns. Ask for help or read the instructions if you’re not sure how to use them.
Team #10: Punch Team
And finally, we have team #10, the punch team! This team will require a bit of strength. Here are the responsibilities:
- Gather ingredients and arrive at the reception hall one hour before the ceremony.
- Decide ahead of time where you’ll be getting the ice and pick it up on your way to the wedding.
- Make the punch.
- Keep it replenished throughout the evening.
- The punch fountain (or bowl) will be waiting for you.
- At the end of the reception, help with clean up.
Shopping list for the punch:
| 100 Guests | 150 Guests | 200 Guests | |
| Cranberry juice (64 oz. bottle) | 3 | 5 | 7 |
| Pineapple juice (46 oz. can) | 4 | 6 | 8 |
| Orange juice (2 qt. carton) | 2 | 4 | 6 |
| Ginger ale (2 liter bottle) | 4 | 7 | 9 |
| Almond extract | 4 tbsp. | 6 tbsp. | 8 tbsp. |
| Oranges, sliced | 3 | 5 | 7 |
| Bagged ice (10 lb bags) | 5 | 7 | 10 |
| Large ice chest | 2 | 2 | 3 |
| Clean 5-gallon buckets | 2 | 2 | 3 |
| Clean 1-gallon buckets | 2 | 2 | 2 |
| Large spoon (to mix punch) | 1 | 1 | 1 |
Recipe for punch:
- In the 5-gallon buckets, mix cranberry juice, pineapple juice, orange juice, and almond extract (divided equally between the buckets).
- Add ginger ale to the mix just before the reception.
- Because the 5-lb buckets will be heavy to lift, fill the 1-lb buckets with punch and pour it into the fountain (or punch bowl). Use the smaller buckets to refill it during the reception.
- Keep the buckets stored under the table.
- Slice the oranges and float them on top of the punch.
- Add ice directly to the punch fountain or bowl, not to the buckets.
- Store ice under the table in the ice chest.
How much does it cost to cater your own wedding?
All of this, despite being tons of food, should cost you much less than hiring a catering company. And it will only take a shopping trip and a few hours of prep (max) from each of your friends/family helping out.
You’ll literally save thousands and thousands of dollars by catering your own wedding.
That’s it! Remember to thank your helpers profusely and to write them a nice note after all this is through.
Thank you again to this wonderful book “Cater Your Own Wedding: Easy Ways to Do it Yourself in Style” for helping me so much to find the research, menu, and tips for this post and my wedding! 🙂